
You have installed Hiberden. This walks the whole happy path: create a project, set up destinations, assign a policy, point Hiberden at a folder, and watch it write and verify every copy in one operation.
You do not need a license to follow along. The first time you add an archive without one, Hiberden asks for your email and offers to start the free 30-day trial. Every feature is on during the trial, and restoring and verifying always work, with or without a license. See The 30-day trial.
1. Create a project
A project is the workspace for related archives. Name it after whatever fits how you work: a client, a show, a matter, a dataset. Your archives will live inside it. Destinations and policies are app-wide, set up in Settings and shared across projects, so the next two steps happen there before you come back to the project.
2. Set up your destinations
Destinations are the places copies live. Add one for each place you want to store archives, picking a kind from the dropdown: "Local folder", "NAS", "Cloud (S3)", or "Tape (LTO)". A local folder or NAS takes a write path, cloud takes your bucket and keys, and tape binds to the connected drive.
Use "Save & test" on each one. That is a real probe, not an assumption: cloud gets a bucket check, disk and NAS get a marker file written, read back, and deleted, and tape asks LTFS whether a drive is attached, without mounting a cartridge (with a real drive on Linux that list is always empty, so the test never shows Connected; see Tape drive not detected). Wait for "Connected" before moving on. If you want to try the tape workflow without hardware, Settings > Tape has a virtual tape drive built for evaluation. It is backed by a folder on this same machine, so a virtual-tape copy is for trying the workflow, not for protecting data: it does not add a real copy to your 3-2-1 setup.
Details in Configuring a copy.
3. Assign a policy
A new project starts without a policy, and it needs one before you archive. A policy is the protection rule: each destination bound to it is one required copy of every archive, so the number of bound destinations is how many times the policy stores each archive.
Open Settings > Policies. The one-click starter policies (Working, Long-term hold, Permanent, Locked) are created without bindings, so bind the destinations you want: for a classic 3-2-1 shape, a local disk or NAS, a cloud bucket, and tape. If your tape destination is the virtual drive, treat that copy as evaluation only; it does not give you real 3-2-1 protection. Then assign the policy to your project. Until a project has a policy with bindings, its archives show "Needs setup".
4. Add the archive
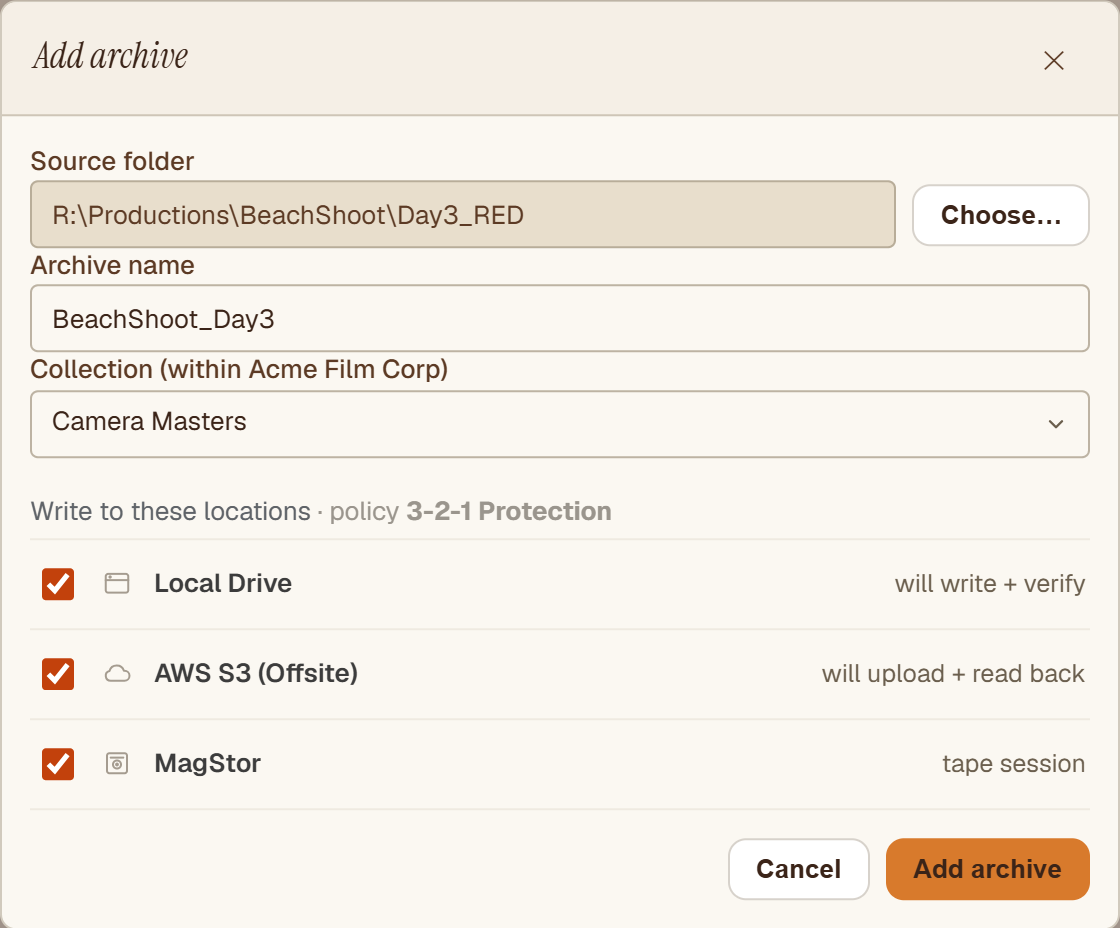
Click "Add archive" and pick the folder you want to protect. That is the whole input: no staging, no hand-built job. Hiberden takes it from there.
5. One operation writes every copy
Hiberden seals the folder into one standard TAR and writes it to every destination in the project's policy in the same operation, tracking each copy separately. You do not run three tools or babysit three transfers. It runs as a job with progress, and while copies are being written the archive's badge shows "In progress".
6. What "Verified" actually means
A write is not finished when the bytes are sent. With the verify-after-write gate on (it is on by default), Hiberden reads each copy back from its own medium after writing it and re-hashes it (SHA-256), then compares the result against the hash recorded when the archive was created. Disk, NAS, and cloud copies are re-read straight from the storage. Tape copies are re-read through LTFS, the tape's own filesystem.
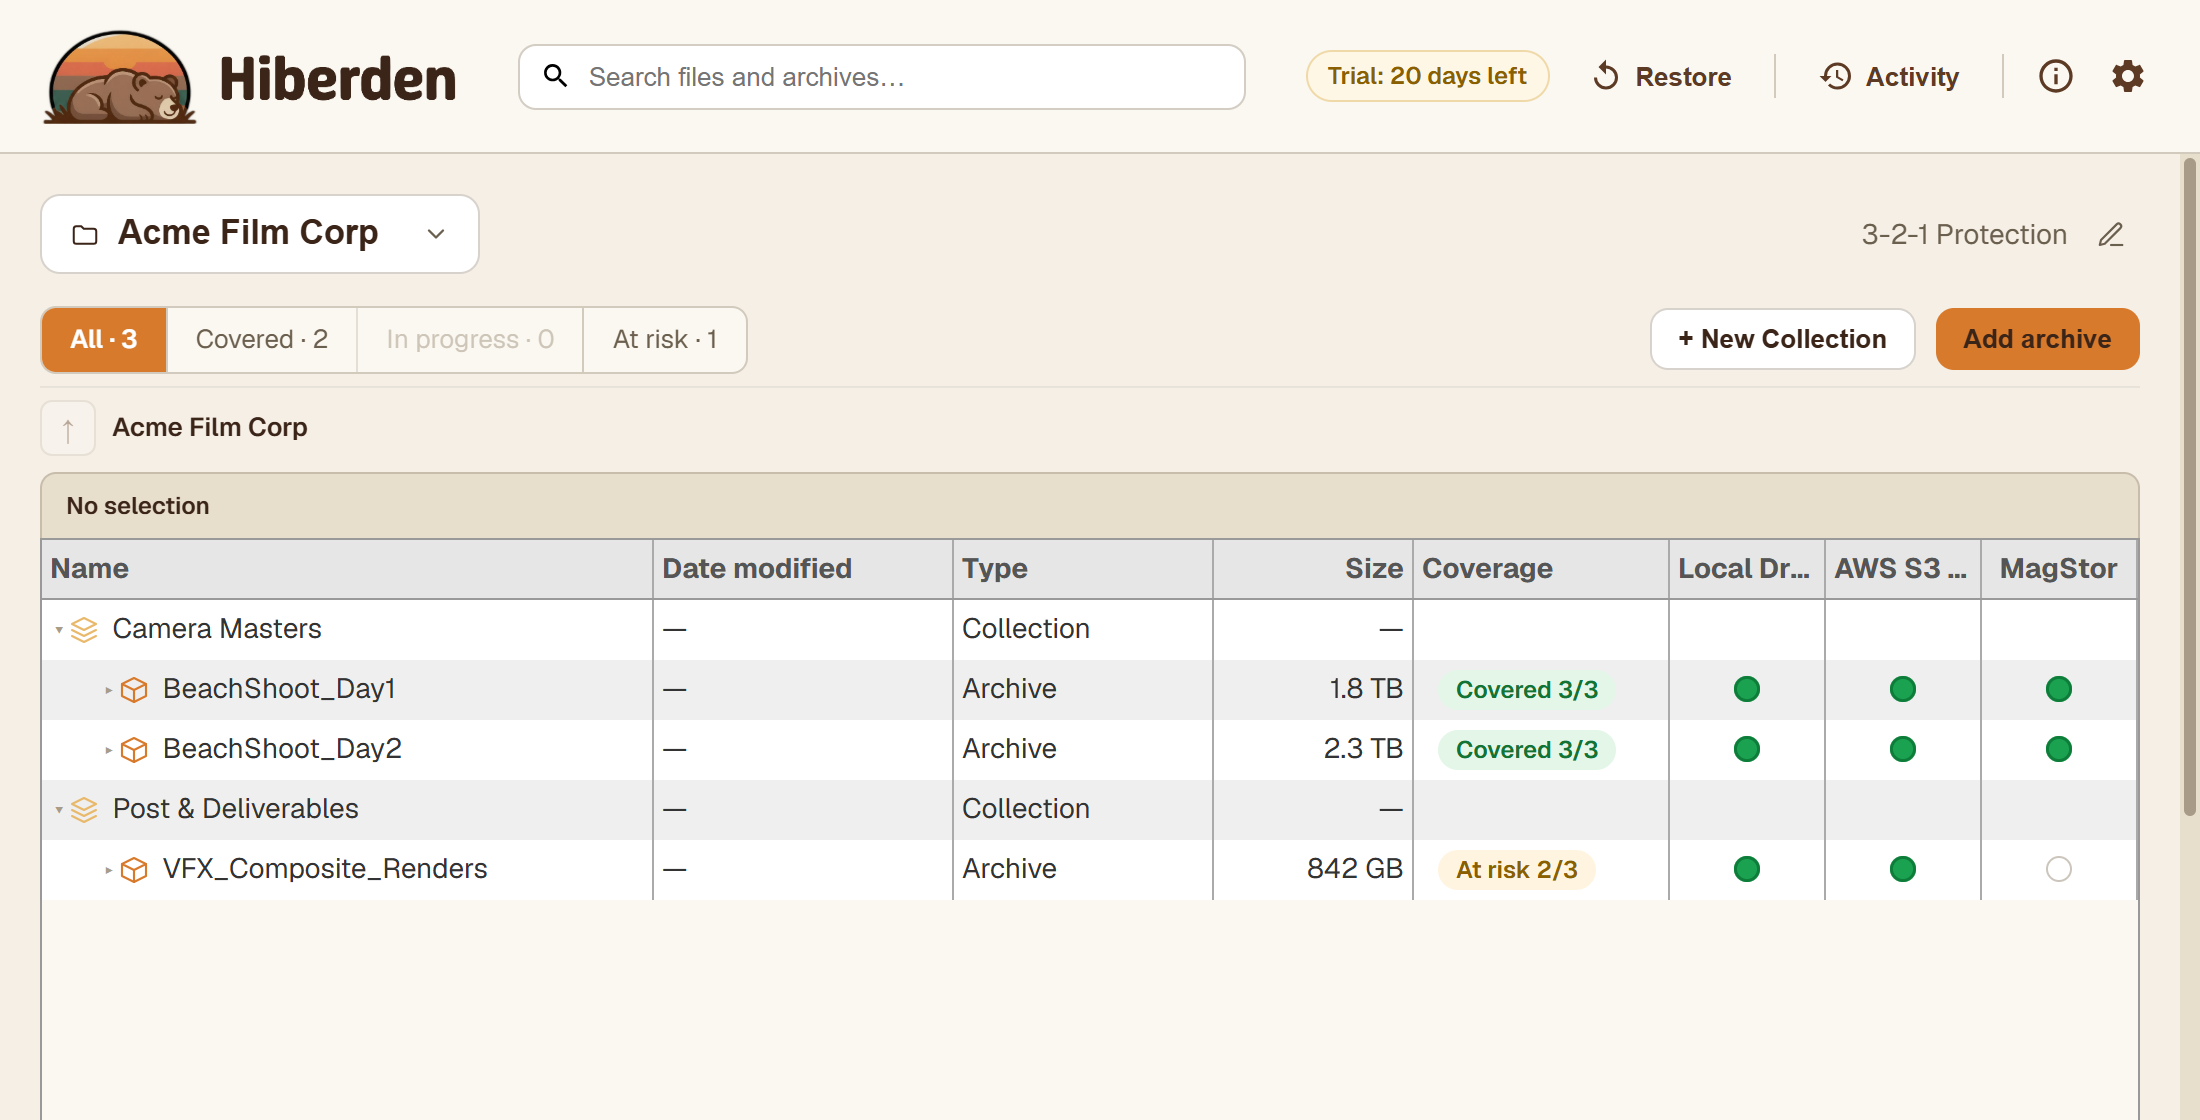
So when the workspace shows your archive as "Covered 3/3" with a filled dot under each destination, that is not "we sent three copies." It means three copies were written, read back, and matched. If any copy had not matched, you would hear about it now, not years from now at restore time.
Where to go next
- Reading coverage status: what every badge and fraction means.
- Policies and required copies: how coverage is computed against the policy.
- Running a verification: re-checking a disk, NAS, or cloud copy on demand, and what a failure tells you.