
Hiberden writes every archive to each destination your policy requires, then reads every copy back and checks the hash before that copy counts as Verified. Here is the whole loop, start to finish.
1. Connect your destinations
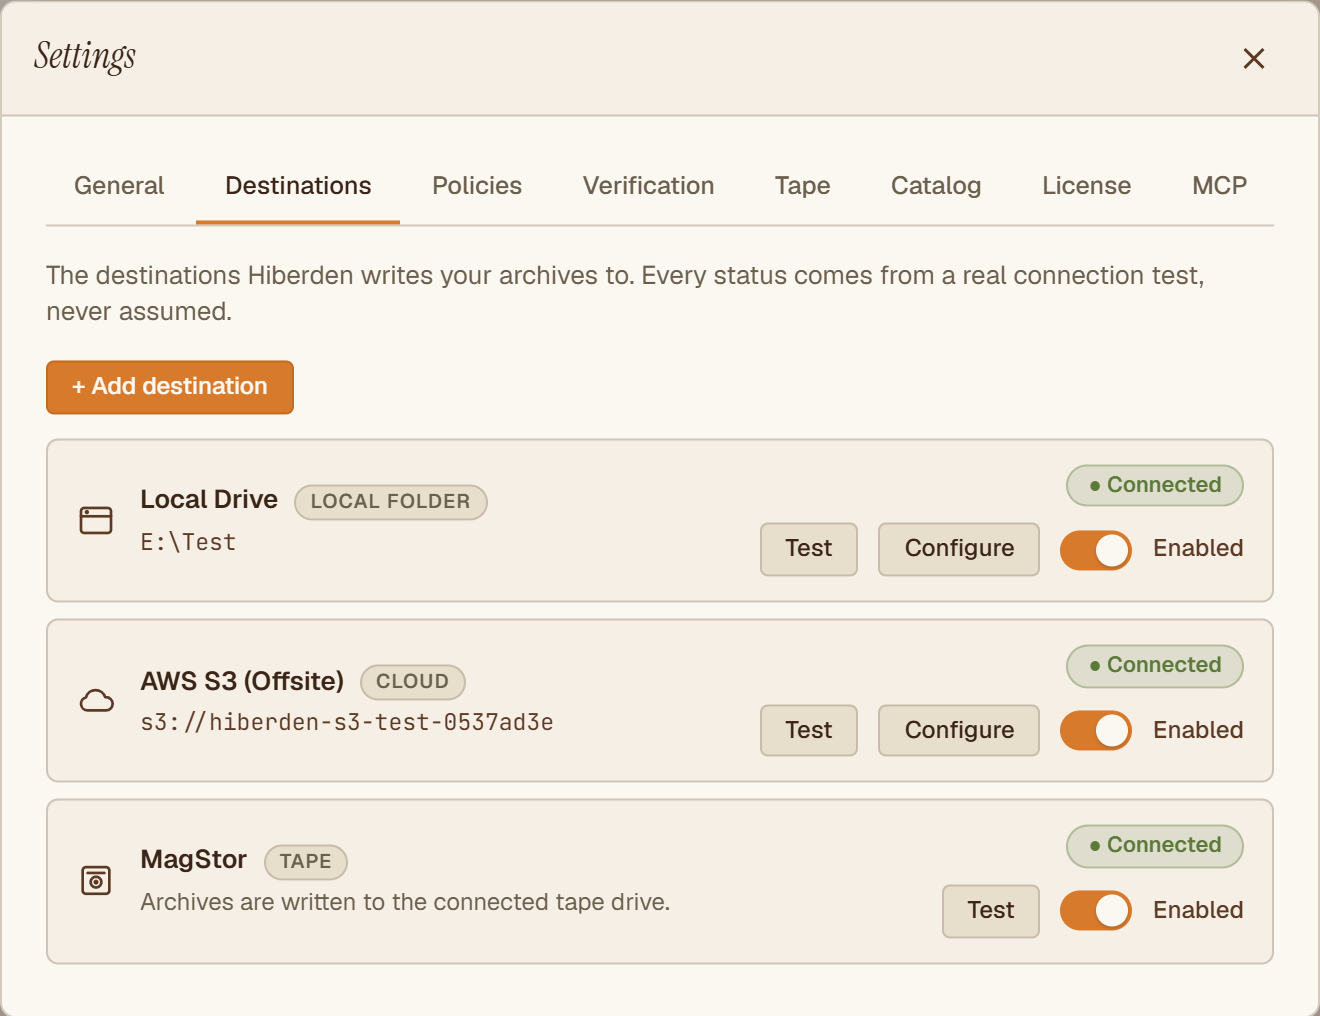
Point Hiberden at a local disk, a NAS share, S3-compatible cloud, or an LTO tape drive. Every "Connected" status comes from a real connection test, never assumed.
2. Create a project and assign a policy
Archives live inside a project, and a new project starts without a policy. Assign one under Settings > Policies before archiving. The policy binds the destinations that must hold a copy; the number of destinations bound is how many copies each archive gets. Skip this step and new archives show "Needs setup" instead of fanning out.
3. Add an archive
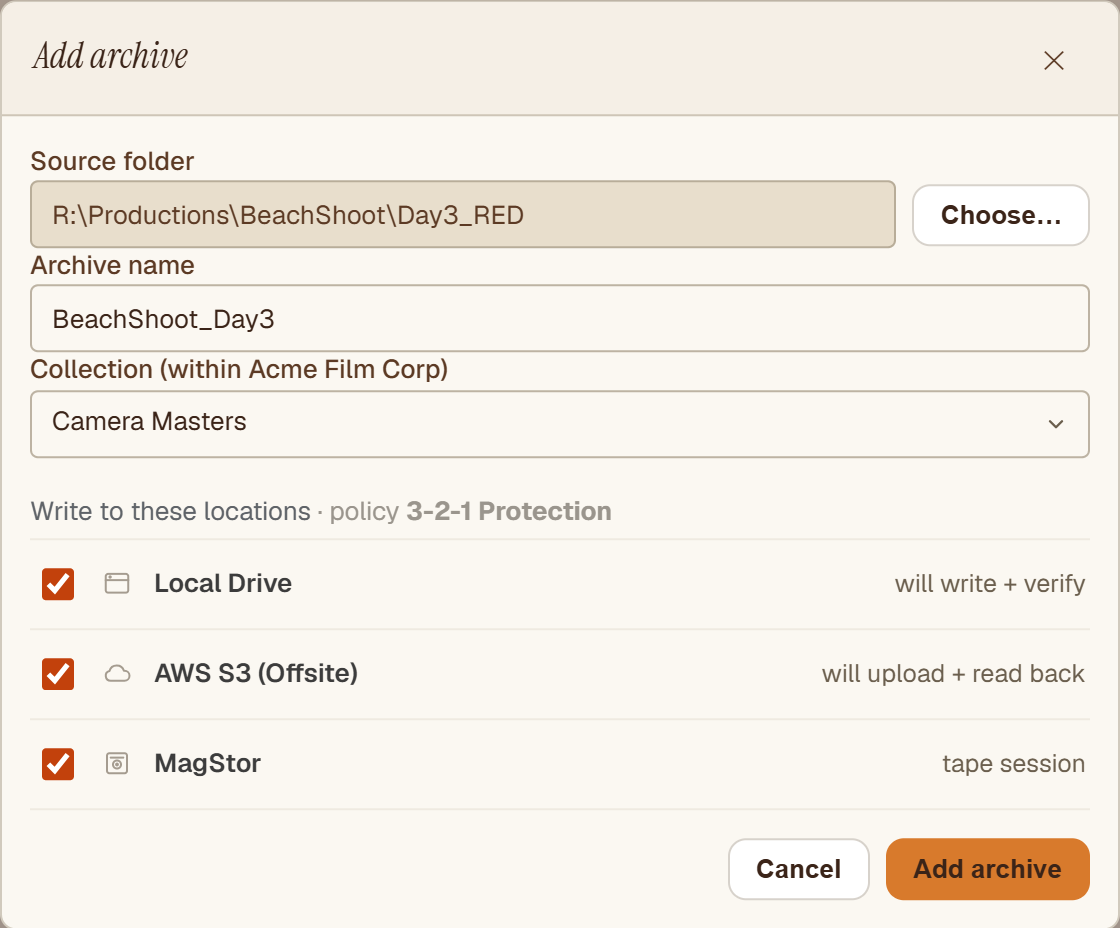
Pick a folder and Hiberden fans it out to every destination in your project's policy at once, writing one copy each to disk, cloud, and tape.
4. Watch every copy get verified
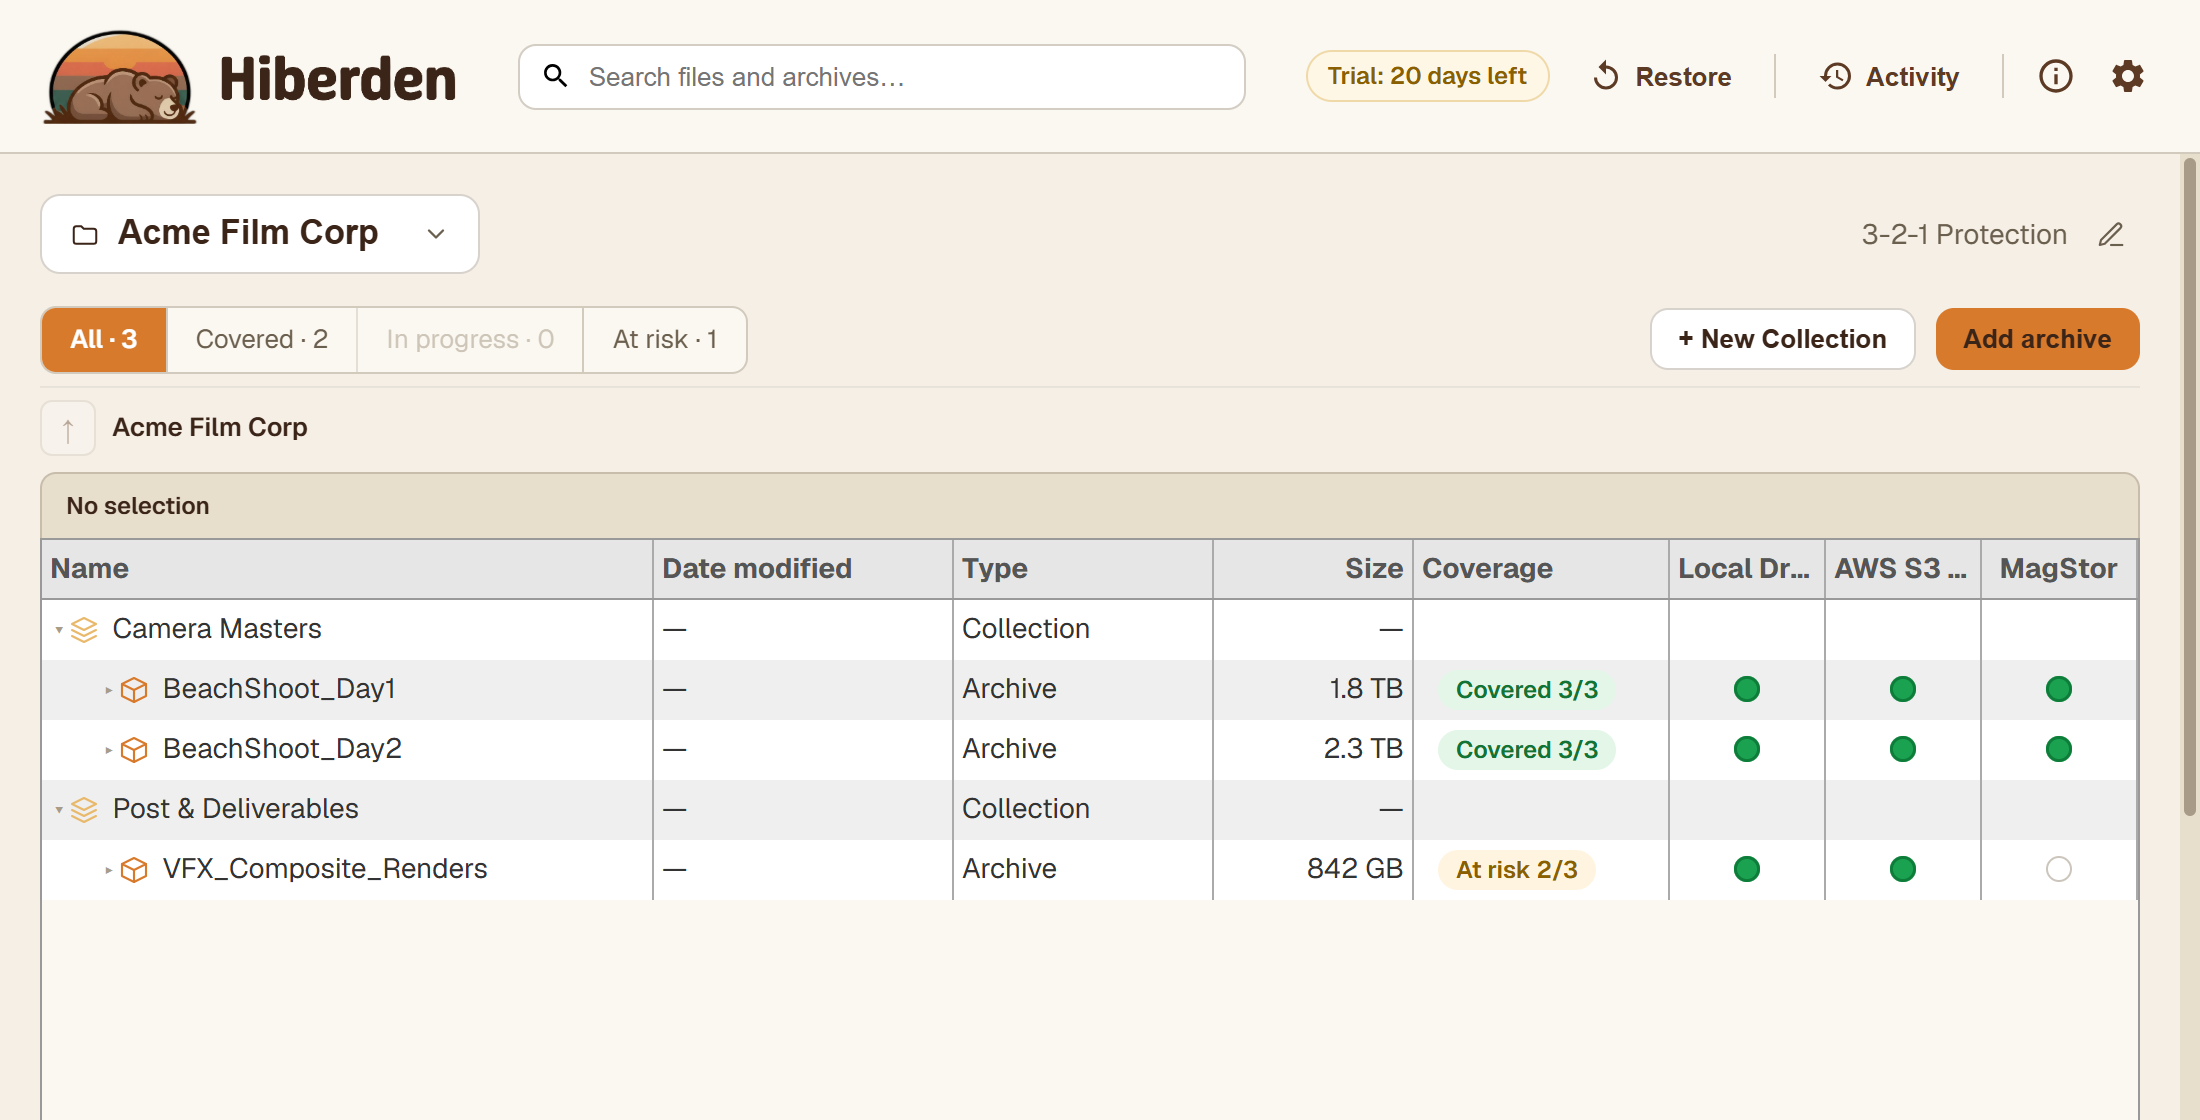
Each copy is written, read back, and hash-checked. The workspace shows exactly how many verified copies exist, per destination, so "Covered 3/3" means proven, not assumed.
5. Restore any verified copy, any time
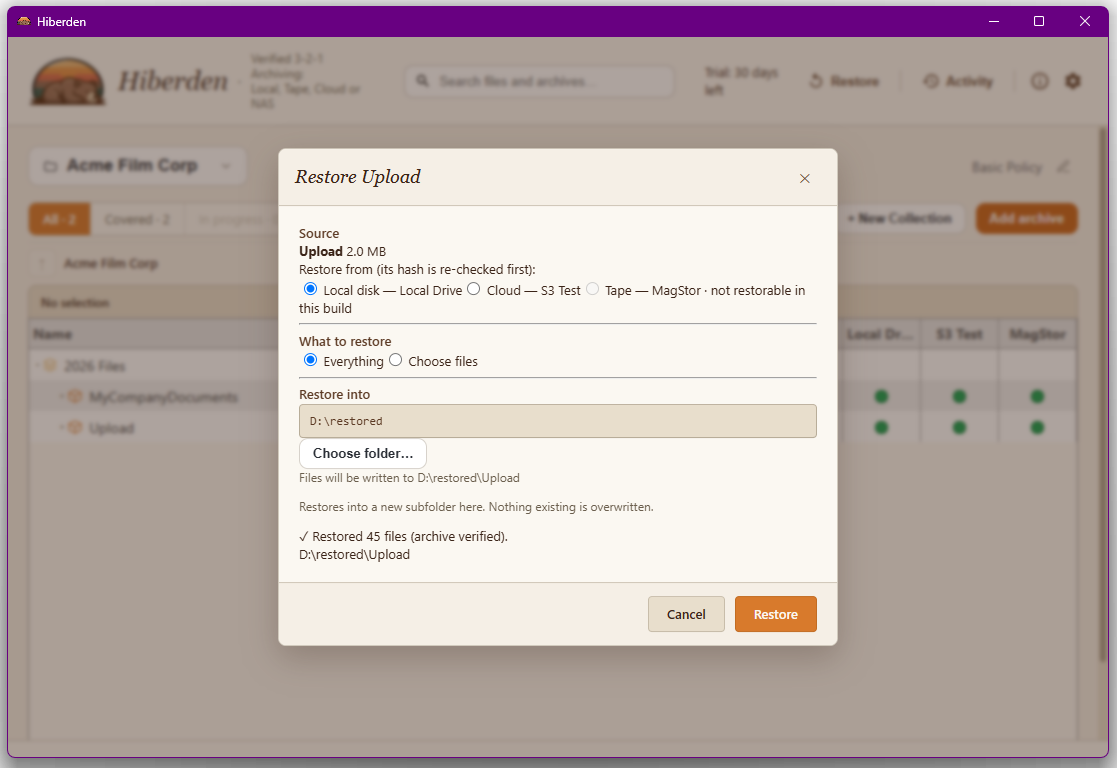
Recover the whole archive from any verified copy, or a single file straight from a disk, NAS, or cloud copy. Hiberden re-checks the hash on the way out, and restoring always works, with or without a license.
Setup happens once. After that, the loop is simple: add, verify, restore.
Where to go next
- Your First Archive walks this same loop step by step, screen by screen.
- Projects, Archives, and Destinations explains how Hiberden organizes what you archive.
- Verified 3-2-1 Archiving covers the strategy behind keeping three proven copies.